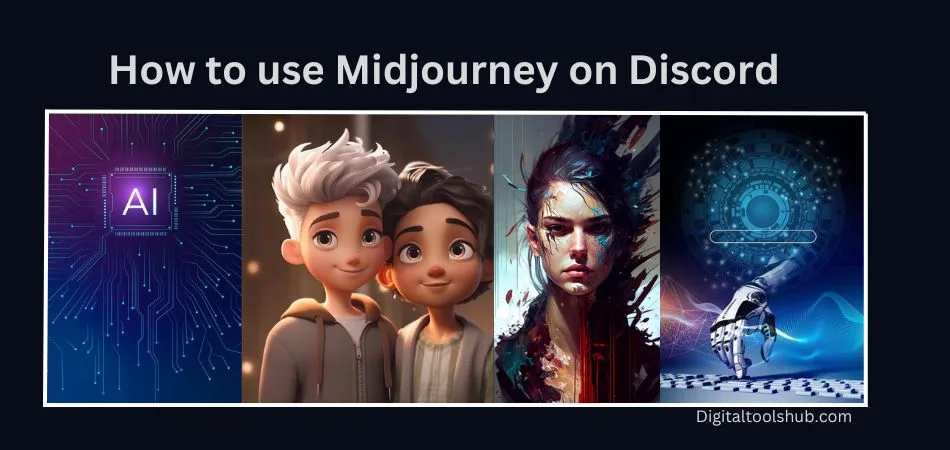
How to use Midjourney on Discord to create AI images
Before we dive into how to use Midjourney, Let’s first get to know What is Midjourney
Midjourney is an AI-powered text to Image or Art generator tool. Midjourney AI creates images within a fraction of seconds with user prompts and it converts that descriptive text into images with 4 different variations with an option to generate further variations of each variation.
Table of Contents
Step by step process of using Midjourney on Discord
Creating and Joining Discord
Start by creating an account on Discord and Go to Midjourney.com, select Join the Beta, or go directly to the Midjourney Discord and join by accepting invite.
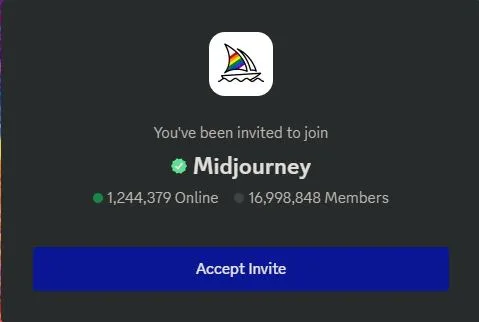
Once you have accepted the invite it will take you to the Midjourney home screen where you can see all the options such as Info, Events, Support, Chats etc.
Go ahead and find the search bar in the top right corner of the home screen and Type in #newbies you will see some suggested rooms available for new users, join any room of your choice, let’s say for Example: #newbies-23. make sure you have verified your registered email address if not it will prompt for email verification.
How To Create Images Using /imagine command
Interact with the Midjourney Bot on Discord using a Command. Commands are used to create images, change default settings, monitor user info, and perform other helpful tasks.
The /imagine command generates a unique image from a short text description (known as a Prompt)
Once you are done with email verification go ahead and type in the command /imagine in the message bar at the bottom as show in the image below

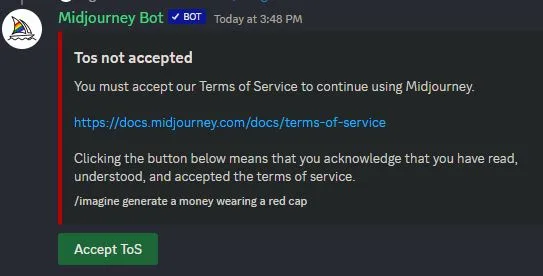
Once you hit enter after enter the image description it will prompt for Terms of service acceptance. Accept the ToS and proceed further.
Now everything is set and you are now ready to create your first AI Image
Using /imagine
- Type
/imagine prompt:or select the/imaginecommand from the slash commands pop-up. - Type a description of the image you want to create in the
promptfield. - Send your message.
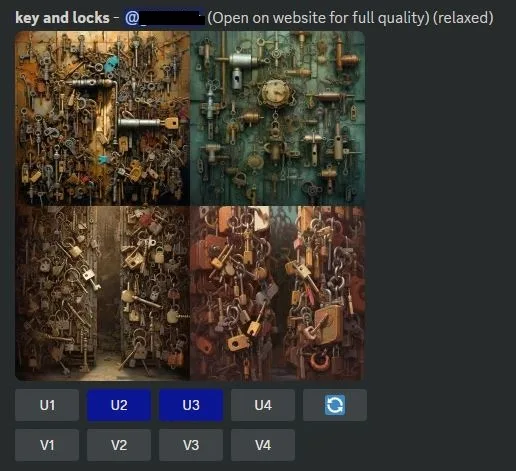
Just imagine you want to create an image of “keys and locks”. This is how you type in the command prompt as shown in image below.

Here is the output AI image Midjourney has generated.
Upscale or Create Variations of the above generated images
After the initial image grid has finished generating, two rows of buttons appear:
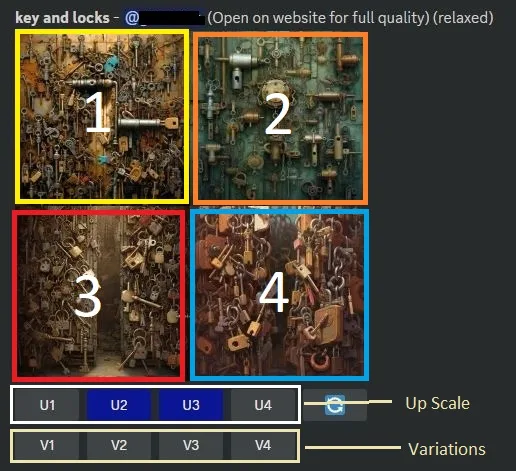
U1 U2 U3 U4
U buttons upscale an image generating a larger version of the selected image and adding more details.
V1 V2 V3 V4
V buttons create slight variations of the selected grid image. Creating a variation generates a new image grid similar to the chosen image’s overall style and composition.
The  (re-roll) reruns a Job. In this case, it would rerun the original prompt producing a new grid of images
Create Variations of your selected image
- Create a variation of the upscaled image and generate a new grid of four options.
- Open the image in your gallery on Midjourney.com
- Tag your best images as Favorite to easily find them on the Midjourney website.
Saving images
Click on the image to open it to full size in new browser tab, and then right-click and choose Save image. On mobile, long-tap the image and then tap the download icon in the top right corner.
Example image link : Link to AI Generated Image
Hurray! you have successfully created a AI image with the help of Midjourney.
Is there more to learn about Midjourney Image Creation process? Ah yes indeed! there are some advanced features as well for advanced users, one such feature is Blend command. Let’s dig in more details about this command.
Blend
The /blend command allows you to upload 2–5 images quickly and then looks at the concepts and aesthetics of each image and merges them into a novel new image.
/blendis the same as using multiple image prompts with/imagine, but the interface is optimized for easy use on mobile devices./blendworks with up to 5 images. To use more than 5 images in a prompt use image prompts with/imagine/blenddoes not work with text prompts. To use text and image prompts together, use image prompts and text with/imagine
How to use /blend
How to use Midjourney with your own custom Image
The very first step to create a own custom image with Midjourney is to Connect your server with Midjourney Bot.
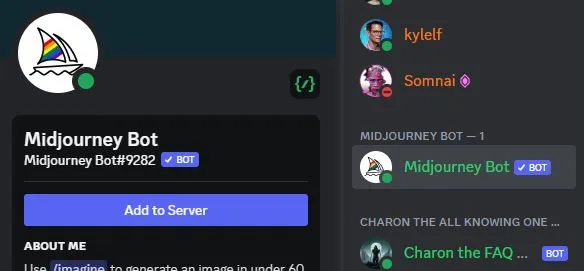
You can find Midjourney Bot in the top right corner under Member List ( 
) icon -> click Midjourney Bot -> Click “Add to Server” button
A popup window will appear, Select your server under “ADD TO SERVER:” click continue -> Authorize and that’s it.
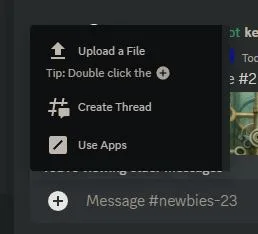
- Upload your image to Discord by clicking on the Plus sign next to where messages are typed.
- Select “Upload a File” and choose the image you want to upload.
- Hit enter to upload your image to Discord.
To use your image as part of a prompt in Midjourney, Make sure you are in your own server screen and not in #newbie-23 room.
Start by typing “/imagine” as usual and then copy the image url address and paste it in the prompt and add description on how you want the image should look like after creation. see the below example for an idea.
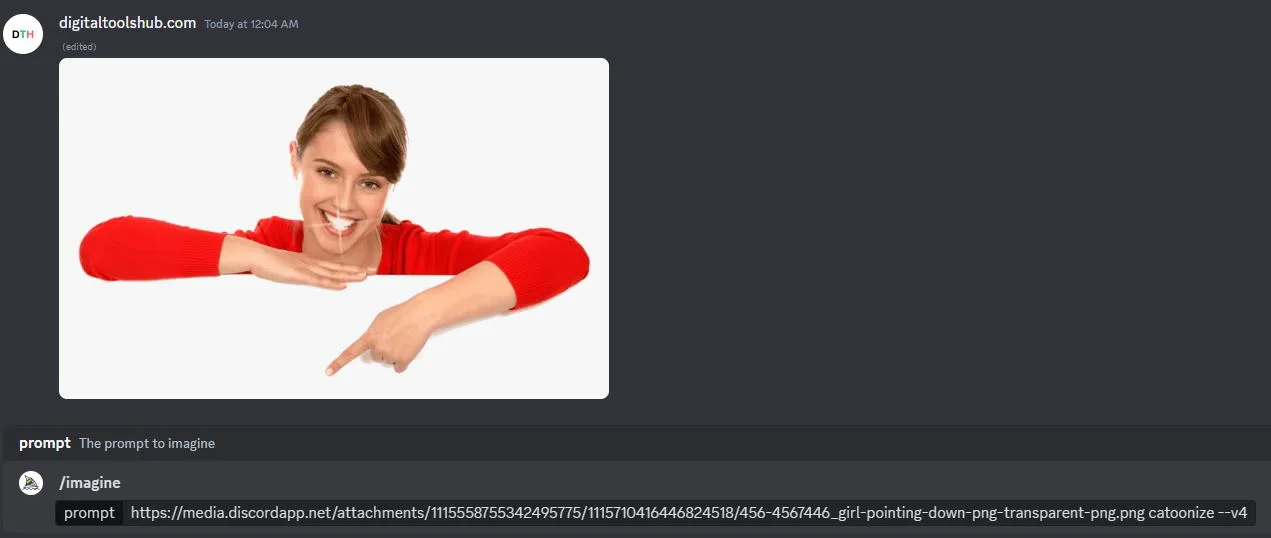
After entering command prompts hit enter and wait for the AI algorithm to process the image and deliver the output AI image.
After mastering the basics of image crafting, take a closer look at Midjourney’s extensive command list and parameter list.
Some sample List of commands:
- /ask: Get an answer to a question
- /blend: Easily blend two images together
- /help: Shows helpful basic information and tips about the Midjourney Bot
- /imagine: Generate an image using a prompt
- /info: View information about your account and any queued or running jobs
- /subscribe: Generate a personal link for a user’s account page
- /settings: View and adjust the Midjourney Bot’s settings
- /prefer suffix: Specify a suffix to add to the end of every prompt
- /relax: Switch to Relax mode
- /remix: Toggle Remix mode
Some Sample List of parameters:
- –aspect, or –ar: Change the aspect ratio of a generation
- –chaos <number 0–100>: Change how varied the results will be—higher values produce more unusual and unexpected generations
- –no: Remove elements from the image
- –quality <.25, .5, 1, or 2>, or –q <.25, .5, 1, or 2>: How much rendering quality time you want to spend—the default value is 1 and hgher values cost more
- –seed <integer between 0–4294967295>: Creates a field of visual noise, like television static, as a starting point to generate the initial image grids. Seed numbers are generated randomly for each image but can be specified with the –seed or –sameseed parameter. Using the same seed number and prompt will produce similar ending images.
- –stylize <number>, or –s <number>: Influences how strongly Midjourney’s default aesthetic style is applied to Jobs
Check out the entire list of Midjourney commands and parameters. Play around with them to find the right designs as per your needs.